How to Make a Short Drama with Kling 4.0 or Kling 4.0 Flash

What the two tiers are
The still above is from Neon Debt, an episode this site took from script to composite; its segments were rendered by choosing a tier per segment.
Both are video tiers in the same editor as every other tier, chosen per segment:
| Tier | Resolution | Segment length | Price |
|---|---|---|---|
| Kling 4.0 | 1080P | up to 30 seconds | 38 credits per second |
| Kling 4.0 Flash | 720P | up to 20 seconds | 29 credits per second |
The numbers move with the knobs: the per-second price and the segment cap come from the site's own pricing, so the exact rate for your account is the one printed on the generate button. You do not need to memorise anything — the button always shows the full price of that segment before you press it.
Where you pick a tier
Two places, one setting. In the episode editor: the button in the top bar that shows the current tier's name. Press it, the Select Model list opens, and you choose Kling 4.0 or Kling 4.0 Flash. In Settings: Model Preferences → Video Model. Both change the same thing: the tier your next segments render on.
Three rules that save confusion later:
- It is a per-segment choice, not a per-project lock. You can render one segment on one tier and the next on another; the composite joins whatever each segment produced.
- Already-made segments keep their tier. Switching the picker does not re-render anything; each version records the tier it was made with.
- Neither tier is the default. The default is the cheap drafting tier; a new project starts there until you change it. Choosing a Kling tier is a deliberate step, which is the point — draft on the default, finish the keepers on the tier you want.
Steps 1 and 2: the project and the cast
If the project already exists, skip to the storyboard. If not:
- Start a project. In step 1 set the format — Short Drama, the aspect ratio (9:16 for a vertical drama) and the dialogue language. These follow the project.
- Add the script by pasting it or uploading a .txt, .docx or .md file, then let the read run: it returns the cast, the locations, the props and an episode-by-episode outline.
- Generate the sheets in step 2: one reference image per character, plus the locations and props. These are what keep a face recognisable in every segment, whatever tier renders it. Keeping characters consistent with Kling tiers goes through that layer in detail.
Your first 15 reference images are free on the account (characters, scenes and props share that pool); after that each one is charged at the image tier's rate.
Step 3: the storyboard
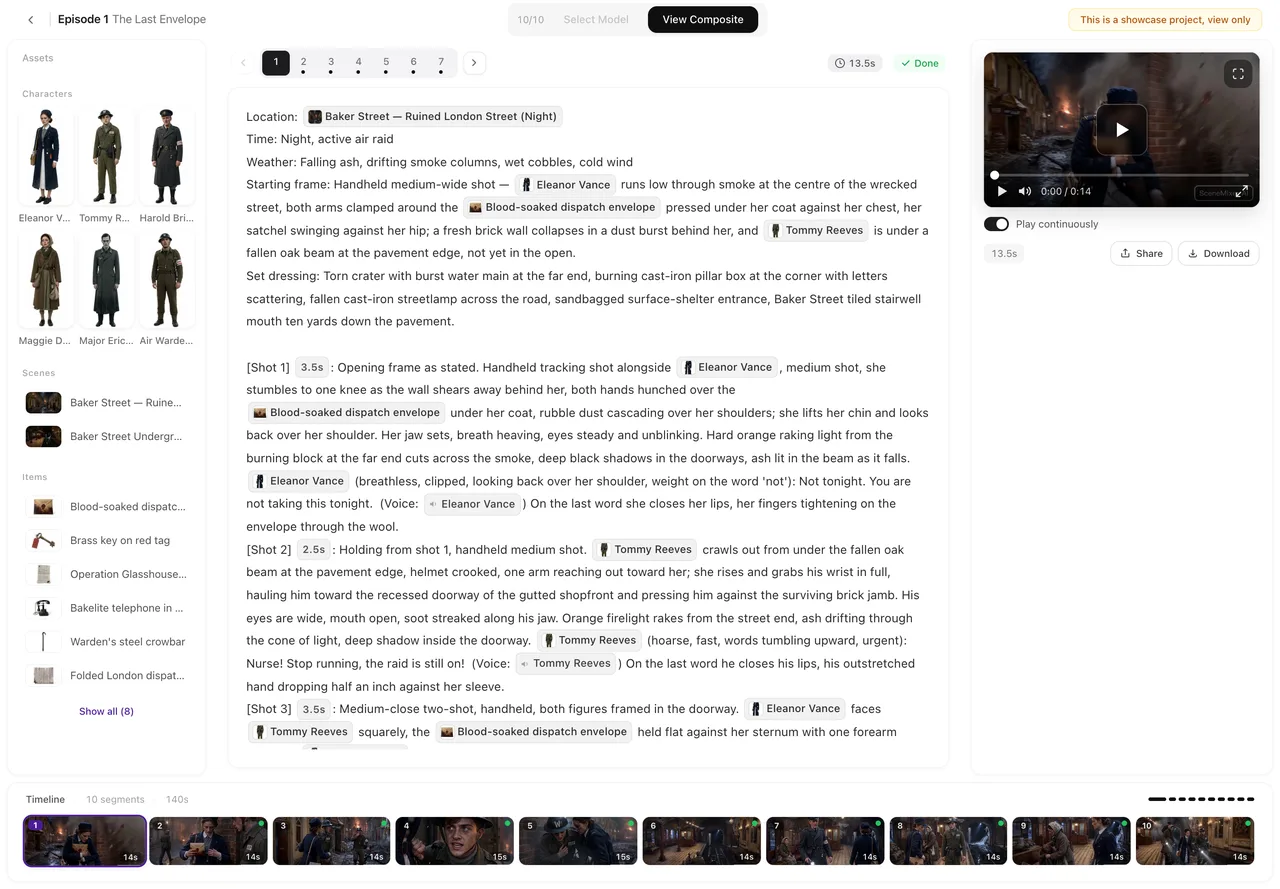
Generate an episode's storyboard in step 3, then edit it in the editor. A storyboard is a stack of segments; each segment holds numbered shots, and each shot carries its seconds, the characters actually in frame, and the lines to be spoken. The segment's length is the sum of its shots' seconds, and that is what you pay for.
Plan the segment length against the tier's cap now rather than later. On Kling 4.0 Flash a segment of 20 seconds or less renders; on Kling 4.0, up to 30. How to write one shot covers the writing side.
Step 4: generate a segment on a Kling tier
- Pick the tier in the model list (see above).
- Select the segment on the timeline. The generate button shows the tier and the price for that segment: seconds rounded up to whole seconds, times the per-second rate, with the price on the button itself.
- Press Generate Video. The credits are held, not yet spent.
- Wait or keep working. The segment card shows progress; you can work on other segments or close the page.
- On delivery the credits are charged and the take becomes the segment's active version. Regenerating later does not overwrite it — every take is kept in the version history.
To render a whole batch instead, Generate all plans every segment that has no clip yet and shows the count, the total seconds, the tier and one total price in a confirmation window. Each segment is charged on its own, and failures are refunded automatically. Segments beyond your concurrency limit wait in line and start on their own.
The 20-second cap on Kling 4.0 Flash
This is the one hard rule that bites. A segment longer than 20 seconds cannot render on Flash, and the editor tells you in three places:
- In the model list, Flash is greyed out for that segment (disabled, dimmed) and carries a short note that the segment is over the cap — segment 24s over cap.
- In Generate all, the segments that are too long are left out of the batch and listed in the confirmation window: 2 segments are longer than this model allows and are left out. Switch models to generate them.
- If you force the generate anyway, the submission is rejected with This segment exceeds the duration cap of the selected model — pick a model that supports longer clips. Nothing is charged.
Two ways out. Shorten the segment — trim its shots' seconds so the total lands at 20 or under — or switch that segment to Kling 4.0, which takes up to 30. The cap is per segment, so a long scene split into two 15-second segments renders on Flash exactly as it should; a single unbroken 25-second take needs the bigger tier.
Sound and lines on these tiers
Same as any tier here: the lines written in the storyboard are performed in the video, generated with the picture rather than dubbed on afterwards, and ambient sound comes out of the same render. The project's dialogue language is the one the cast speaks; you set it once in step 1.
If a line must land on a beat, write it into the shot with enough seconds for the character to say it. The rules for writing lines and speaking characters are in How to write one shot and Native dialogue vs dubbing.
Regenerating and fixing a segment
Editing the storyboard text is free. Change a word, move a second, rename who is in frame — nothing is charged until you render again. Regenerate renders a new take on the selected tier and costs the segment again; the old take stays in the version history and switching between versions is free.
For a clip that is already finished, the player has Edit this clip with its own tools — trim it, redub a line, edit visuals, enhance clarity. Each of those shows its own price before you confirm it. What each one does is set out in Edit this clip: which fix to use and Fix one shot without redoing the episode.
One habit worth keeping: fix the storyboard first, render last. A segment that reads wrong is cheapest to correct before it is rendered.
What this costs
Both tiers are billed by the second, like every video tier here. A 10-second segment on Kling 4.0 costs 10 × 38; the same 10 seconds on Kling 4.0 Flash costs 10 × 29. The button shows the total, and the credit history records one line per segment.
- Held when you press, charged on delivery. A failed generation is refunded automatically; a generation whose outcome is unclear is held for review instead of being charged twice.
- No free allowance on either tier. Video is billed from the first second here; the free parts of an account are the reference images and the first project's episode-1 storyboard.
- The fix tools are priced the same way — on the button, before you confirm.
Draft elsewhere, finish here: render the whole episode on the cheap default tier while the story is still moving, then re-render only the segments you keep on the Kling tier you want. Draft at 480P, finish at 1080P is that working pattern, and Kling 4.0 vs Kling 4.0 Flash is which of the two to finish on.
Common errors, and what to do
| What you see | What it means | What to do |
|---|---|---|
| This segment exceeds the duration cap of the selected model — pick a model that supports longer clips. | The segment is longer than this tier renders (20 s on Flash). | Shorten the segment or switch it to Kling 4.0. |
| Flash greyed out in the model list, with a note like segment 24s over cap | Same cap, shown before you press. | Pick the other Kling tier for this segment, or trim it. |
| A generation that fails and says the credits were returned | Nothing was delivered. | Press generate again; nothing was charged. |
| A generation held for review | The outcome was not clear. | Do not resubmit; the hold resolves to a refund or a delivered take. |
| A rejected generation (content check) | Text or a reference image was flagged before rendering. | Edit the flagged material and render again; rejections are refunded. |
The full list of editor messages, with reasons, is in every edit-this-clip message and content rules and checks.
What is Kling's own specification, and what is this tier
Keep the two apart, because they are not the same thing. The tier you pick in the editor gives you what the table at the top of this page says: 1080P or 720P, a segment cap, and a per-second price, all of it shown live from this site's pricing.
Kling's own model announcements are the model's specification: as officially announced by Kling, 4.0 supports up to 4K, up to 10 keyframes, Omni Reference with up to 15 references, stereo audio in 9 languages, and 10-bit HDR marked as coming soon. Those are the officially announced capabilities of the model, not a list of what any particular tier here exposes — this site's tier is defined by the picker, the segment cap and the price.
The announcement itself is summarised at Kling's 4.0 model release page, and our own write-up of what it says is Kling 4.0: what was announced.
FAQ
Are Kling 4.0 and Kling 4.0 Flash the default tiers?
No. A new project starts on the cheap default tier; you pick a Kling tier yourself, per segment, from the model list in the editor or in Settings under Model Preferences.
How long can a segment be on each tier?
Kling 4.0 takes segments up to 30 seconds; Kling 4.0 Flash up to 20. The cap is per segment, and the editor blocks a segment that is over it before anything is charged.
What happens if a segment is longer than 20 seconds and Flash is selected?
Flash is greyed out for that segment with an over-cap note, Generate all leaves the segment out and says so, and forcing the generate is rejected with a message telling you to pick a model that supports longer clips. Nothing is charged.
How much does a segment cost?
Seconds times the per-second rate of the tier. The rate and the total for your segment are printed on the generate button before you press it; the table above shows the two tiers side by side.
Is the price the same on both tiers?
No. Flash is the cheaper per-second tier; that is what you trade the 1080P resolution and the extra 10 seconds of segment length for.
Does the free first-project allowance cover these tiers?
No. Video is billed from the first second here, on every tier. The free parts of a new account are the 15 reference images and the first project's episode-1 storyboard.
Do the lines get spoken, or do I add sound afterwards?
The cast performs the lines written in the storyboard in the same render as the picture, with ambient sound from the same pass. There is no separate dubbing step.
Can I change a segment after rendering it?
Yes. Editing the storyboard text is free; Regenerate makes a new take and costs the segment again, keeping the old take in the version history. A finished clip can also be trimmed, redubbed, re-edited or enhanced from Edit this clip, with its own price shown before you confirm.
Can I mix these tiers with other tiers in one episode?
Yes. The tier is chosen per segment and the composite joins each segment's active version, whatever tier produced it.
Where do the officially announced 4K, keyframe and Omni Reference figures come from?
From Kling's own model announcements: 4K, up to 10 keyframes and Omni Reference are the officially announced 4.0 specification. What this site's Kling tiers expose is what the model picker here shows, with its own caps and prices.
Draft cheap, finish on the tier you picked
Open a project, read the script, write the storyboard - then render the segments on Kling 4.0 or 4.0 Flash.
Updated October 15, 2026
Pricing·Novel to Video·Guides·Samples·Alternatives·Answers·Support·Privacy·Terms·Legal·Contact·Affiliate program·© 2026 SceneMixer